May 11, 2025
Fix TE1 Error on LG Dryer: Easy DIY Troubleshooting Guide
Seeing a TE1 error on your LG dryer? Don’t worry—you’re not alone. This error typically indicates a fault in the thermistor circuit, and while it may sound complex, it's something most DIYers can tackle with the right instructions. This guide will walk you through what the TE1 error means, how to troubleshoot it safely, and how to get your dryer running like new again.
What Does the TE1 Error Mean?
The TE1 error on an LG dryer generally points to a temperature sensing issue involving the thermistor. The thermistor monitors the internal temperature of the dryer and helps regulate the heat. If it malfunctions or loses connection with the control board, you’ll see a TE1 error code.
There are three common causes:
- Faulty thermistor: A failed thermistor sends incorrect temperature data or no data at all.
- Damaged or loose wiring: Wires connecting the thermistor to the control board can become corroded, loose, or broken over time.
- Defective control board: If the control board can't read the thermistor, it may throw a TE1 code even if the thermistor is fine.
Before You Begin: Safety Precautions
Before attempting any repair or inspection, follow these important safety steps:
- Unplug the dryer: Always disconnect the appliance from the power source to avoid electrical shock.
- Let the dryer cool: Give it at least 30 minutes if it was recently used.
- Use a clean, well-lit workspace: This helps avoid accidental damage and improves visibility.
- Keep your hands dry and wear gloves: Moisture and electricity don’t mix—safety first.
- Document all connections: Take photos of wiring before disassembly for easier reassembly.
- Follow your LG user manual: Manufacturer instructions often include specific warnings and steps for your model.
Step 1: Power Cycle the Dryer
Start with a basic reset:
- Unplug the dryer from the wall outlet.
- Wait at least 5 minutes.
- Plug it back in and turn it on.
- Check if the TE1 error has cleared.
If the error reappears, proceed with physical diagnostics.
Step 2: Test the Thermistor and Wiring
The thermistor is typically located near the dryer’s heating element or exhaust assembly. Here’s how to test it:
- Remove the dryer’s back panel using a screwdriver to access internal components.
- Locate the thermistor—it’s a small, round or rectangular part with two wires leading to it.
- Unplug the thermistor from the wiring harness and inspect for signs of damage, corrosion, or looseness.
- Set a multimeter to the resistance (ohms) setting and place the probes on the thermistor’s terminals.
- Compare the reading to the resistance values listed in your dryer’s manual or online (typically 10K–12K ohms at room temperature).
If the reading is far outside the acceptable range, the thermistor needs to be replaced.
Step 3: Inspect the Wiring
While the thermistor is disconnected, inspect the wires that connect it to the control board. Check for:
- Frayed or split insulation
- Burn marks or discoloration
- Loose terminals or corroded connectors
Use your multimeter to check for continuity between each end of the wiring harness. If there’s no continuity, the wiring is damaged and must be repaired or replaced.
Step 4: Consider the Control Board
If the thermistor and wiring are both in working condition but the error code remains, the issue may be with the dryer’s main control board. This component interprets signals from all sensors, including the thermistor.
While replacing a control board is more complex and costly, it may be necessary if all other causes have been ruled out. If you’re not confident in replacing the board yourself, contact a professional technician for diagnosis and service.
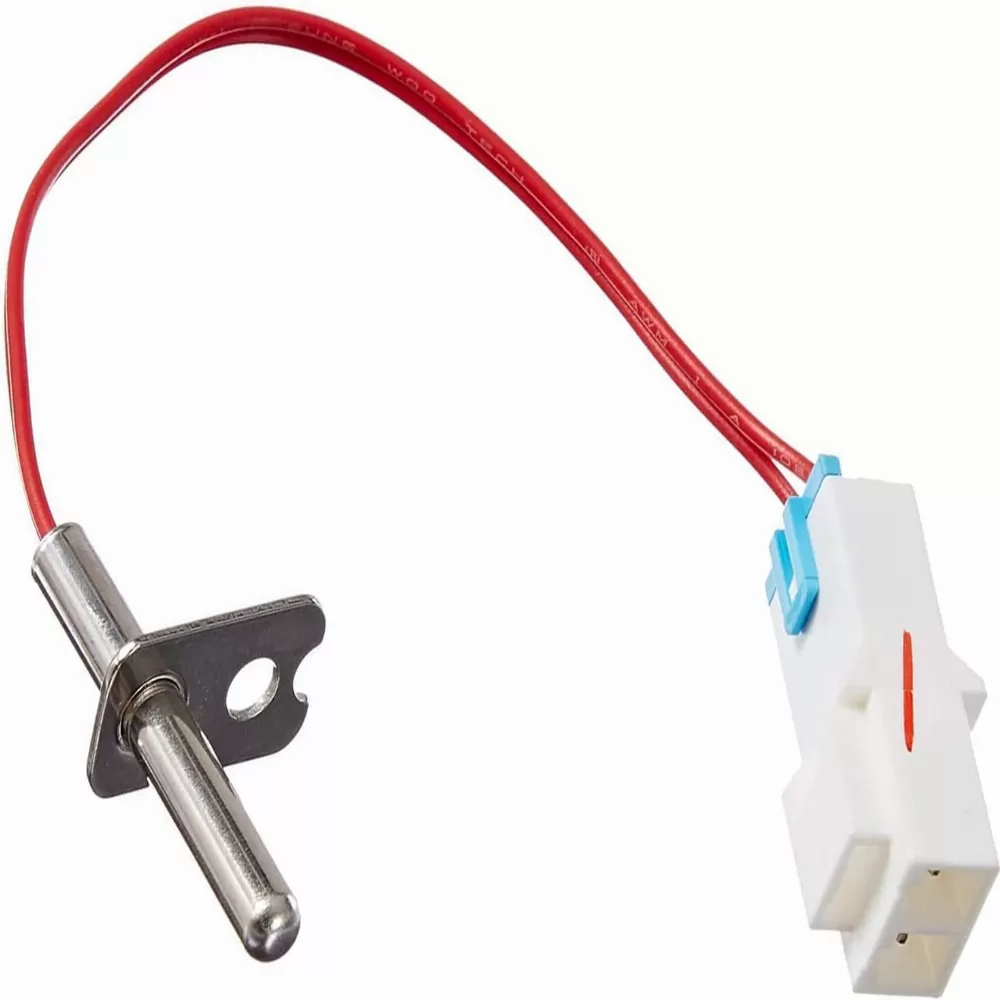
Recommended Replacement Part
If your thermistor tests faulty, the good news is that it’s easily replaceable. Click the image below to order a new thermistor:
Final Tips
After replacing the thermistor (or repairing any damaged wiring), plug the dryer back in and run a full drying cycle. If the TE1 error is gone and the dryer heats and dries correctly, the issue has been resolved.
Prevent future sensor issues by regularly cleaning the lint filter, inspecting vents, and ensuring airflow isn’t restricted. Dust and heat buildup are frequent culprits behind sensor and board failures.
Conclusion
The TE1 error on your LG dryer doesn’t have to be a reason to panic—or to spend hundreds on a service call. With careful attention to safety and a bit of diagnostic work, you can often resolve the problem yourself. From resetting the dryer to replacing the thermistor, the steps outlined above will guide you through the process.
Still need help? Click the ask a question button on the sidebar and a technician will answer any questions you might have.